The Loopler Tracks and Layouts
Nine circuits, limited gate slots, and events like Oil Leak. Infinity, Hotdog, and Crown are the named ones — rank the rest by what they punish.
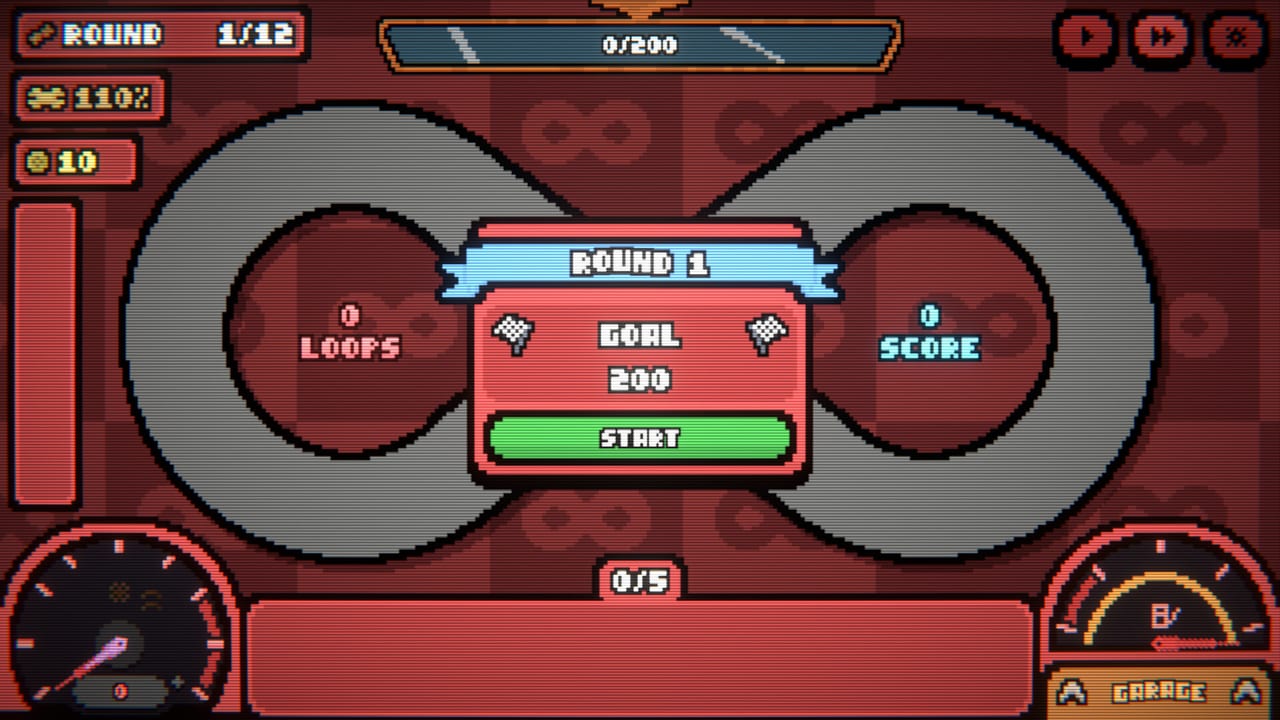
1.0 ships nine tracks with different looks and layouts. This page names the three that are public — Infinity, Hotdog, Crown — and ranks the rest by slots, geometry, and fail state, not by invented titles. If the New Run carousel shows a silhouette this list never names, read three facts: how many gate pins it offers, whether the car actually drifts, and which node-map events sit on the route. Those three facts are the tier list. Live layout plus Inspect Track beat any letter here. Pair the circuit with a car identity and one engine from the card list before you copy a rank from a different eight.
S/A/B/C is this patch’s pick priority for a plan, not a beauty contest. S means the layout wants the engine you brought. A means a fair default for learning. B means a specialist — take it when you already know the fail state. C means the geometry fights the plan (a no-drift oval for Golden Drift, a slot-starved pin for score-spam, a fuel-punish route for a tank you have not solved). Five difficulties exist per track. Leaderboards sit per track and difficulty, including lowest-loops boards. A Hotdog S for ghosts can be a C for a lowest-loops speed build.
Confirmed layouts
Infinity — A default, S for learning loops and for Infinity Mode itself. The carousel copy calls it a loop that never quite ends. It is the figure-eight most players meet first. Goal values on round 1 often sit near 200. A standard run is twelve rounds; Infinity Mode is the endless contract after that, with progress-to-infinity shown on the result screen. Slot count is honest enough to plant a Boost-first or Score-spam sentence without starving either. Events still appear on the node map, so it is not a tutorial sandbox. Use Infinity to finish one clean twelve-round on easy before you chase Crown. For the endless version, How to Go Infinite is the breakpoint page; this list only tells you the tarmac is the forgiving one.
Hotdog — A for drift engines, B for pure boost-first if the curves steal speed, S if you drafted Golden Drift or Sick Drift. The name is the shape: elongated, with curves that actually slide. On-drift cards and the Sick Drift charm jump a letter here. Ghost copies that also drift can turn a B ghost plan into an A. Fuel can be meaner than Infinity if the car spends extra time in the slide. If your garage Drift Grip is still a stub, Hotdog is a teacher, not a free S. Lowest-loops boards on Hotdog still want Boost in slot one; the curves do not cancel gate order.
Crown — B specialist, S only when you came prepared for the slot and fuel check. The carousel calls it fit for a monarch. It arrived in the demo as a later unlock and remains the named “this is not the opening eight” track. Expect a different gate-slot count and meaner geometry than Infinity. If Crown gives you fewer pins, cut Gold and the second support archetype first. If it starves the tank, Reserve Tank and a Fuel gate move to S and Loopler-style many-loop plans move down until the gauge is solved. Do not take a fresh score build onto Crown as a first try.
The other six tracks exist in 1.0. They will look different. They will not all be figure-eights. Rank each one the first time you see it with the same three questions: slots, drift, fail state. Do not wait for a wiki name. A tight pin with four slots is a speed track until proven otherwise. A wide, copy-friendly layout with room for Ghost plus Score is a ghost track. A long, event-heavy node map is an economy-and-durability track for the yellow-style car.
Gate slots, events, and fail states
Slots are a budget. Demo figure-eights often showed six pins. Later tracks can show more or fewer. Thirty gates exist in the game; a track will never ask for thirty. Empty pins are legal. If the layout is slot-starved, Boost-first beats score-spam because one Boost in slot one still does its job, while one Score in a six-pin plan does not grow fast enough. Inspect Track before the first purchase. The gate list is the combo language; the track is the word count.
Events sit on the node map, not on the tarmac art. Oil Leak is the confirmed example: it punishes refuel efficiency, which is exactly the stat Reserve Tank is built to ignore and Efficiency is built to spend. On an Oil Leak route, Reserve Tank is S, extra on-loop tops are B, and a second Fuel gate can be A. Skull-marked columns are risk lanes; they are not the Skull charm, but they rhyme — you are opting into a harder contract for a better reward. Question-mark nodes hide the rest. Blue and orange columns are different risk, not different tracks. Two Infinity runs can diverge before a single card is drafted because the map forked.
Fuel-punish layouts are the ones where the car spends time off-boost, in a slide, or on a long eight with few Fuel pins. Bring Reserve Tank, a Fuel gate, and a car with Fuel Tank on the radar. Yellow-style gold converters are B here; you have to survive the round before the converter prints. Blue-style extra durability is A because you will take ugly coasting.
Ghost-reward layouts are the ones with a pass the copies cannot miss: a tight cluster of Score, Lucky, or Chain, or a shape that keeps extra cars on paying tarmac. Slot count has to allow Ghost plus the thing being copied. If the track only gives you three pins, Ghost is often a C because you cannot afford the copy and the payload. Hotdog-style curves can be ghost-friendly if copies also drift; they can be ghost-hostile if copies fly off the paying line. Read the first loop with Inspect Track before you spend.
Difficulties, boards, and challenges
Five difficulties exist per track. Stay on the easiest setting until you can finish twelve rounds without panic-rerolling. Each step up is a different board, including lowest-loops. A Crown clear on easy is not a Crown S on the top difficulty. Leaderboards are optional and per track per difficulty; chase them after the engine is real, not as a first-hour goal. How to Play explains the HUD numbers those boards care about.
Daily and weekly challenges reuse these layouts with extra rules. A challenge on Hotdog with a fuel modifier is not the same as a normal Hotdog. Pacifier and Trade Requisition change shop math; Skull changes the goal. Do not copy a normal-run track rank into a challenge without reading the modifier. The five unique challenge modes are their own contracts; treat this page as the tarmac layer only.
Pick a track the way you pick a gate row: one sentence. Infinity to learn. Hotdog to test drift and ghosts. Crown when the tank and the slot budget are already solved. The unnamed six when you can explain why the pins and the events match the build you opened. For a first-session route that does not bounce off locked silhouettes, use Getting Started and the walkthrough. For garage parts that make a mean layout playable, use Loadout and meta. For the shop checklist you keep next to Inspect Track, use the synergy planner.
Frequently Asked Questions
Quick answers to the most common questions.
How many tracks are in The Loopler?
Nine in 1.0. Infinity, Hotdog, and Crown are the confirmed names. Rank the others by gate slots, drift, and events such as Oil Leak — do not wait for a wiki title.
Which track should I play first?
Infinity or Hotdog until you understand slots. Crown is a later check on fuel and pin count. Getting Started is the first-hour route.
Do all tracks use the same gate slots?
No. Slot count is part of the layout. A six-pin figure-eight is not a four-pin specialist. Inspect Track, then plant using the gate list.
What does Oil Leak do?
It is a node-map event that punishes refuel efficiency. Reserve Tank (ignores fuel efficiency) jumps up; extra on-loop tops jump down. Details on the card list.
Are leaderboards per track?
Yes. Boards exist per track and difficulty, including lowest-loops. Daily and weekly variants live on Challenges. Infinity Mode is covered in How to Go Infinite.