Getting Started with The Loopler
Learn the loop, spend gold on purpose, and survive the first figure-eight before you chase Infinity Mode.
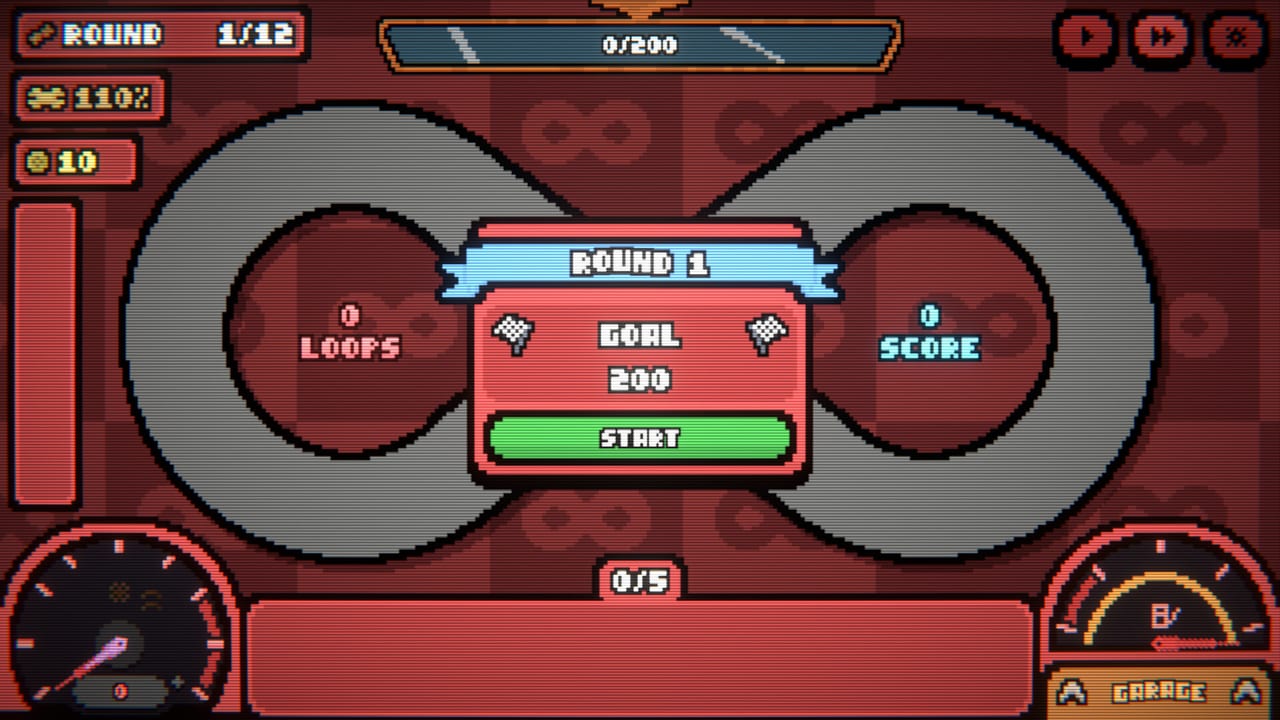
The Loopler looks like a toy slot-car set and plays like a roguelite deckbuilder. A car drives a closed loop on its own. You do not steer. You draft cards, drop gates onto the tarmac, and stack charms while the score bar tries to outrun you. This page is the first-hour route for the Steam 1.0 build that released on September 11, 2026. If you only want a glossary of meters, jump to How to Play. If you already know the HUD, skip to the walkthrough or a committed speed build.
What you are actually doing
Each run is a sequence of rounds — the HUD shows values like 1/12 and 12/12, so a standard track is twelve rounds long. Round 1 often opens with a 200-point goal on a figure-eight. The car loops, each loop prints score, and you win the round when the bar fills. Fail states are empty fuel and broken durability. Gold is the shop currency. After a round you pick rewards (gold, a durability bump, card packs) and, when the node map offers it, you enter the pit stop.
The round-select screen is a branching node map, not a linear playlist. Blue, orange, and skull-marked columns are different risk lanes. Question-mark nodes hide events such as Oil Leak, which punishes refuel efficiency. That map is why two runs on the same track never feel identical, even before cards enter the picture.
Your first three decisions
1. Track. The New Run carousel includes Infinity (“a loop that never quite ends”), Hotdog, Crown (“fit for a monarch”), and locked layouts. Play Infinity or Hotdog until you understand gate slots. Crown and later tracks change how many gates you can plant and how mean the geometry is. Rankings live on the tracks page.
2. Car. Early cars differ by a starting bonus — extra durability, gold on round complete, and similar identity effects. Do not wait for a “perfect” car. A yellow-style gold converter helps shop-heavy plans; a durability bump helps messy first hours. Full identities are on the car tier list.
3. Difficulty. Five modes exist in 1.0. Stay on the easiest setting until you can finish twelve rounds without panic-rerolling the pit stop. Leaderboards exist per track and difficulty, including lowest-loops boards if you later pivot to a speed build.
How a round is won
Start the round, then watch three resources:
- Score versus goal. The top bar is the contract. It climbs sharply — round 6 can already ask for five-figure goals.
- Fuel and the boost gauge. Boost is how you get around the eight faster. Fuel is how long you are allowed to stay in that state. Empty tank plus no refuel plan is a dead run.
- Durability. The percentage in the corner is your health. Repairs and round rewards keep it alive. Garage parts later raise the cap.
The bottom tray is your live kit: ghost count, fuel/refuel, upgrade chance, and a score chip. Those four tiles are the language of the run. When they say +9 Ghost, you are in a ghost build. When they say 15% Refuel, you are buying time. When they say +500 Score, you are in a score build.
The pit stop, without wasting gold
A typical pit stop sells a card pack (often 10 gold), a flash-sale trinket, a row of gates (15–20 gold), and a row of charms (10–30 gold). You get a handful of pins, a cheap reroll, Inspect Track, and Exit Pitstop. New players buy everything. That is how you go broke before round 4.
Spend in this order on hour one:
- One gate that matches the plan — boost first for speed, score for points, refuel if the tank is already scared.
- One card pack if you still have a hole in the engine (no on-loop fuel, no on-loop gold, no ghost).
- Charms only when they stack with what you already own. A charm that does nothing until you have gates is a trap.
- Skip a bad pack. The skip button is priced; paying to refuse garbage is correct.
Named cards you will see immediately include Loopler (scores total loops multiplied on loop), Lucky Strike (a 10% on-loop chance to buff a random gate), and Golden Drift (gold from drift ticks). Treat them as examples of the three families: score-on-loop, luck-on-loop, and gold-on-drift. The card tier list and gate tier list explain why order on the track matters more than rarity stars.
Meta progression you should not ignore
Between runs, open the Garage. The left panel is a radar of Frozen Threshold, Boost Cap, Top Speed, Acceleration, Durability, Drift Grip, Fuel Tank, and Fuel Efficiency. The center column is car parts — even a “Leaky Pump” with no base benefit can roll a +2% Lucky Chance or a boost-cap bump. The Unlocks spine is a meta tree; mid-20s levels already unlock extra cards, gates, and dice-like modifiers. You do not need to max it before having fun, but you should spend gold on one part per session. Details sit in Loadout and meta.
Speed-up buttons in the top-right exist because this is an idle-flavored game. Use them once you trust the build. Do not 4x a run you do not understand yet — you will miss why a gate failed to fire.
A clean first-session checklist
- Finish one full 12-round track on easy. Dying on purpose to “save time” teaches nothing about goal scaling.
- Place gates left-to-right as a combo, not as decoration. Boost before gold before score is the usual speed sentence; score gates want to be hit often, not first.
- Pick one engine: speed, ghosts, or score. Mixing all three is how demo players felt the shop was “the only thing that matters.”
- After the session, skim How to Go Infinite so Infinity Mode is a plan instead of a panic.
- Bookmark Challenges for dailies once the main tracks click.
The Loopler rewards the same patience as other deckbuilders: skip, reroll, and refuse cards that do not talk to your gates. The car will keep looping. Your job is to make each loop worth more than the last without lighting the tank on fire. When that sentence makes sense, you are ready for the Guides hub and a real build page.
Frequently Asked Questions
Quick answers to the most common questions.
Do I control the car in The Loopler?
No. The slot car drives itself. Mouse, controller, and touch all work because you are drafting, placing gates, and shopping, not steering. See How to Play for the HUD.
How many rounds is a normal run?
The HUD uses a 12-round track on the figure-eight layouts shown in 1.0. Infinity Mode continues past that contract. Goal values start near 200 and climb fast.
What should I buy first in the pit stop?
One gate that matches your plan, then a card pack if the engine is missing a trigger. Charms come third. The synergy planner is a shop checklist.
Does demo progress carry into the full game?
No. Mheep stated demo and playtest progress reset for 1.0. Treat the demo as practice, then follow this Steam guide and the launch notes.